IIS Configuration
This article covers the configuration needed to implement .NET migrated web application in IIS.
First, let’s explain the architecture of .NET web comparing to the Magic web.
When a request is received from the Web, Magic handles it using three layers:
- Requester (mgriqispi.dll)
- Application Server (Broker)
- Application code
As oppose to Magic, .NET handles the request using only two layers
- Application Server (IIS)
- Application code
.NET uses the IIS as a standard application server.
In case you do want to have an extra layer between the IIS and the application, please refer to the article below:
https://blogs.msdn.microsoft.com/friis/2016/08/25/setup-iis-with-url-rewrite-as-a-reverse-proxy-for-real-world-apps/
Configuration
.NET and ASP extensions
Make sure .NET and ASP are installed on the IIS server. Open the ‘Turn on or off Windows features’ by using Run -> optionalfeatures

Application
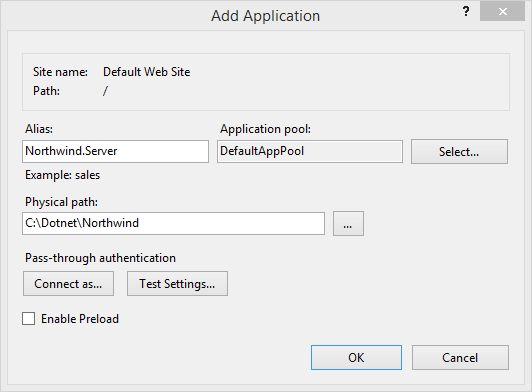
Under the Web site, add an application with the alias name of [project name].Server (Northwind.Server) and point it to its folder (physical directory)

The main files in this folder are:
- Bin folder – the .NET binaries (migrated code)
- Request.aspx – the requester
- Services.aspx - for Remote requests (Web Services, CMD and etc) see below: Remote requests
- INI file (Northwind.Server.ini)
32-bit application
Since Magic is a 32-bit application, the migrated code is also a 32-bit application so make sure that the Application Pool of the Web site Enables 32-bit applications

User identity
IIS is running under the build-in user (who logged to the server) or a custom user. Make sure to add sufficient rights to the user you choose.

Remote requests
You can monitor the remote requests using the link below:
http://localhost/[ProjectName].Server/services.aspx
Help us improve, Edit this page on GitHub
or email us at info@fireflymigration.com
